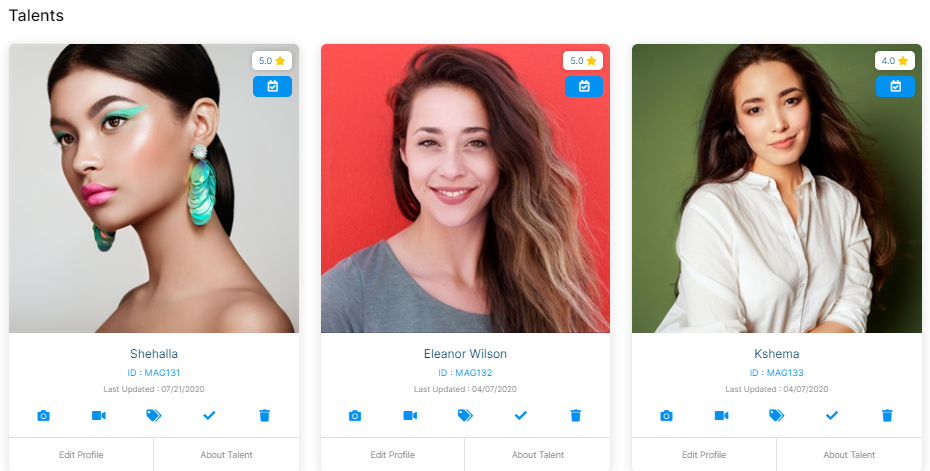
In StarAgent, there are separate tabs on the talent profile to upload images and videos. All the uploaded media will be published in the profile, and you can choose which media to display in the portfolio packages sent to clients.
Upload An Image
- Click on 'Talent' in the left sidebar.

- The page will refresh, and you will be taken to the 'Talents' page.

- Navigate to the required talent profile, and click on ‘Photos’.

- Select ‘Add Photos’.

- Now upload files either via:
✔️ Drag-And-Drop
- Open your File Explorer (or Finder window on Mac) and select the file you wish to upload.
- Left-click on the file and drag it to the drop zone, then release the mouse button.

✔️ Manual selection
- Don't want to drag-and-drop? Click on the ‘Choose File’ button instead and choose a specific file to upload.

- Once you have made your selection, choose the folder/photo category to which you want to upload the image.

✍ NB: You cannot upload a single file across multiple folders. If you wish to do so, upload the file separately into different folders. |
- Click on ‘Start Upload’ for the selected image to appear on the talent profile.

✍ NB: Once you click ‘Start Upload’ please stay on the page and wait until the file is completely uploaded. In case if you wish to stop uploading, click on ‘Abort’. |
- If you wish to choose the uploaded image as the talent’s ‘Profile Image’, just click on the photo, adjust the framing, and tap ‘Crop & Save’.

Manage Uploaded Images
- Go into the talent profile for the talent whose images needs to be viewed/managed, and click on 'Photos'.

- Tap 'View & Manage'.

- Choose the photo-type (For instance, 'Profile' or 'Portrait') you would like to view/edit.

- You can now view the uploaded images of the talent.

✍ NB: Don't be alarmed if you don't see the whole portfolio images here. Choose a different photo-type from the drop-down, and you'll see the rest! ? |
- Now, it's easy to delete a photo which is no longer needed, set the picture as either 'Main' image or 'Secondary' image, and change the photo status to 'Active' or 'Inactive'.

Remember:
|
