StarAgent is designed with a number of shortcuts to help you move around faster in it. This article will provide you with a list of all such important shortcuts and accessibilities.
Quick Search Bar
Accessing the right information quickly is the key to working productively. Use the Search Bar at the top of your logged-in screen to find the relevant talent profiles, client details, or project information that you need to get work done.
To start a search:
- Click inside the search field at the top.
- Type what you’re looking for into the search field.

✨ Tip: You can search for talents, clients, or projects in StarAgent by name, title, or ID. |
- Click on a suggested option in the list to open it, or tap the ? (Search) icon next to it to view your search results.

‘Add New’ Shortcuts
Clicking the ‘+Talent’, ‘+Projects’, ‘+Task’, and ‘+Client’ circular tabs in the ‘Dashboard’, will get you instant access to the ‘Add New Talent’, ‘Add New Project’, ‘Add New Task’, and ‘Add New Client’ pages respectively.
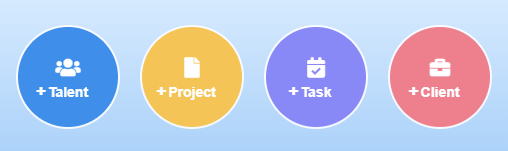
✨ Tip: You can also use the ➕ (Plus) icon located on the right top corner of the dashboard to create a new task, or add a new client, project, or talent quickly. |
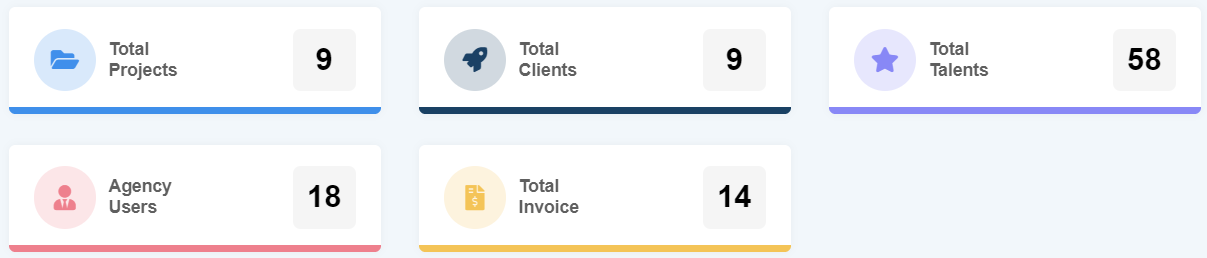
Statistics Accessibility
Need to get a quick overview of various statistics?
Hover your mouse over these ‘Statistics Tabs’ in the Dashboard to view the number of Projects, Clients, and Talents saved by your agency members, the number of agents who work in your agency, and the number of Invoices sent through StarAgent in detail.
Instant Chat
Rather than searching for the 'Talent Chat' option to start communicating with your agency members, you can use the ?️ (Speech Bubble) icon in the top right corner of the dashboard.

The little red number on it will let you know the count of unread messages you have in your StarAgent Chatbox.
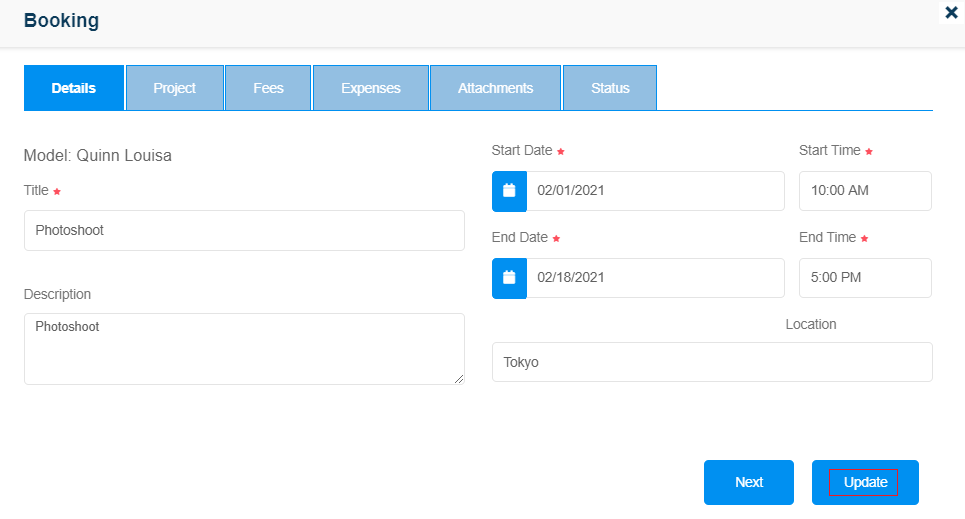
View Bookings
In order to view and edit already created bookings, you don't need to go back to the saved booking on your ‘Talents Calendar’. Instead, you can quickly do it by:
- Going to the ‘Bookings’ tab in the left sidebar

- Navigating to the required booking

- Clicking on ‘View’

- Editing the details and hitting ‘Update’.