The 'Package Module' in StarAgent shows you a list of all the packages created in your workspace. Each of these individual packages is referred to as 'Package Cards'. When you're required to submit casting options or talent portfolios to clients, you can create a new package, attach model comp cards to these packages, and send them with just a few clicks.
Features Of ‘Packages Card’
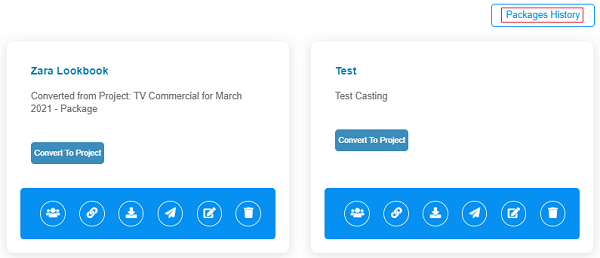
Each ‘Package Card’ in StarAgent displays the package name and the description. The blue menu bar present at the bottom of each Card is where you can access different features.

✍️ NB: The Packages with the 'Converted from Project' phrase on it are the packages that are directly created from the 'Projects Card'. |
Manage Talents
To populate your Package with talents, click on ‘Manage Talent’, navigate to the required talent profiles, and hit 'Assign'. (To deselect, click on the 'Delete' option on the selected profile).

A better way to select specific talents who you would like to include in a created Package is by using the 'Search' and 'Advanced Search' options under 'Browse Talents'.
You can also choose additional photos and videos and save notes for each talent in particular before sending a package.
Client Link
If you click on the ‘Client Link’ icon, the screen will refresh and take you to the template of how it will be displayed to your client.

We recommend always have a proof check this way before sending a Package to a client.
Download As PDF
Convert 'Packages' to PDF files, download them and use them for future references.
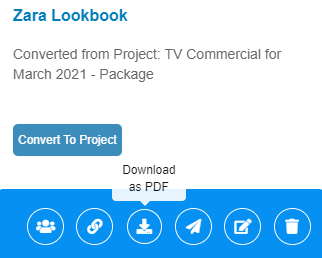
You can also share them with anyone at any time, even when you are offline.
Send Package
Click on the 'Send Package' icon, enter in the client's name and email ID, and hit 'Send' to email the created Package to the client. You can choose to decide between including the talent measurements in the Package or not.

Not only these, but you can also guide your clients to provide feedback directly from the sent packages, select talents by checking the boxes near to the concerned talent profiles and note down comments related to talents in the fields provided next to their profiles in the package.

You can view all these details instantly by going into the ‘Packages History’ tab in the top-right corner of the page.
Edit
Click on the 'Edit' icon to update the already stored information about the Package.

The screen will refresh and provide you with fields to update the details under 'Add Packages'. Do the required edits and hit 'Update' to complete.
Delete
If you no longer need a Package, click on the 'Bin' icon on the right-most part of the Package Card.

Please think twice when doing this because StarAgent does not offer you an option to retrieve the deleted details. Deletions are permanent.
✨Tip: StarAgent also allows you to convert a 'Package' directly to a 'Project' by clicking on the 'Convert To Project' button on a Package. This will let all the talents in the Package to get added to the created Project. |
Packages History
The ‘Packages History’ tab will give everyone from your team an up-to-date record of the approved packages.
On clicking on the ‘View’ option next to a particular package, you can get into the granular details of the package, along with the client feedbacks.